17+ Samsung Galaxy S25 Ultra Tips and Tricks
The Samsung Galaxy S25 Ultra is a powerhouse of features, so many that it can feel overwhelming. In this post I’m going to break down 17 tips and tricks to help you unlock the full potential of your device. From basic Android navigation to more advanced features, hopefully there’s something interesting for everyone.
1. Reclaiming the Classic Quick Settings:
One UI 7 introduces a split notification and quick settings panel, which some might find less intuitive. Luckily, you can revert to the classic style! Swipe down from the top, tap the Pen, and choose Panel Settings. There you’ll see the options to combine things back to how they used to be. Now, a single swipe reveals notifications, and a second swipe shows the full quick settings panel. While you're there, customize the panel by rearranging and editing the toggles to your liking.
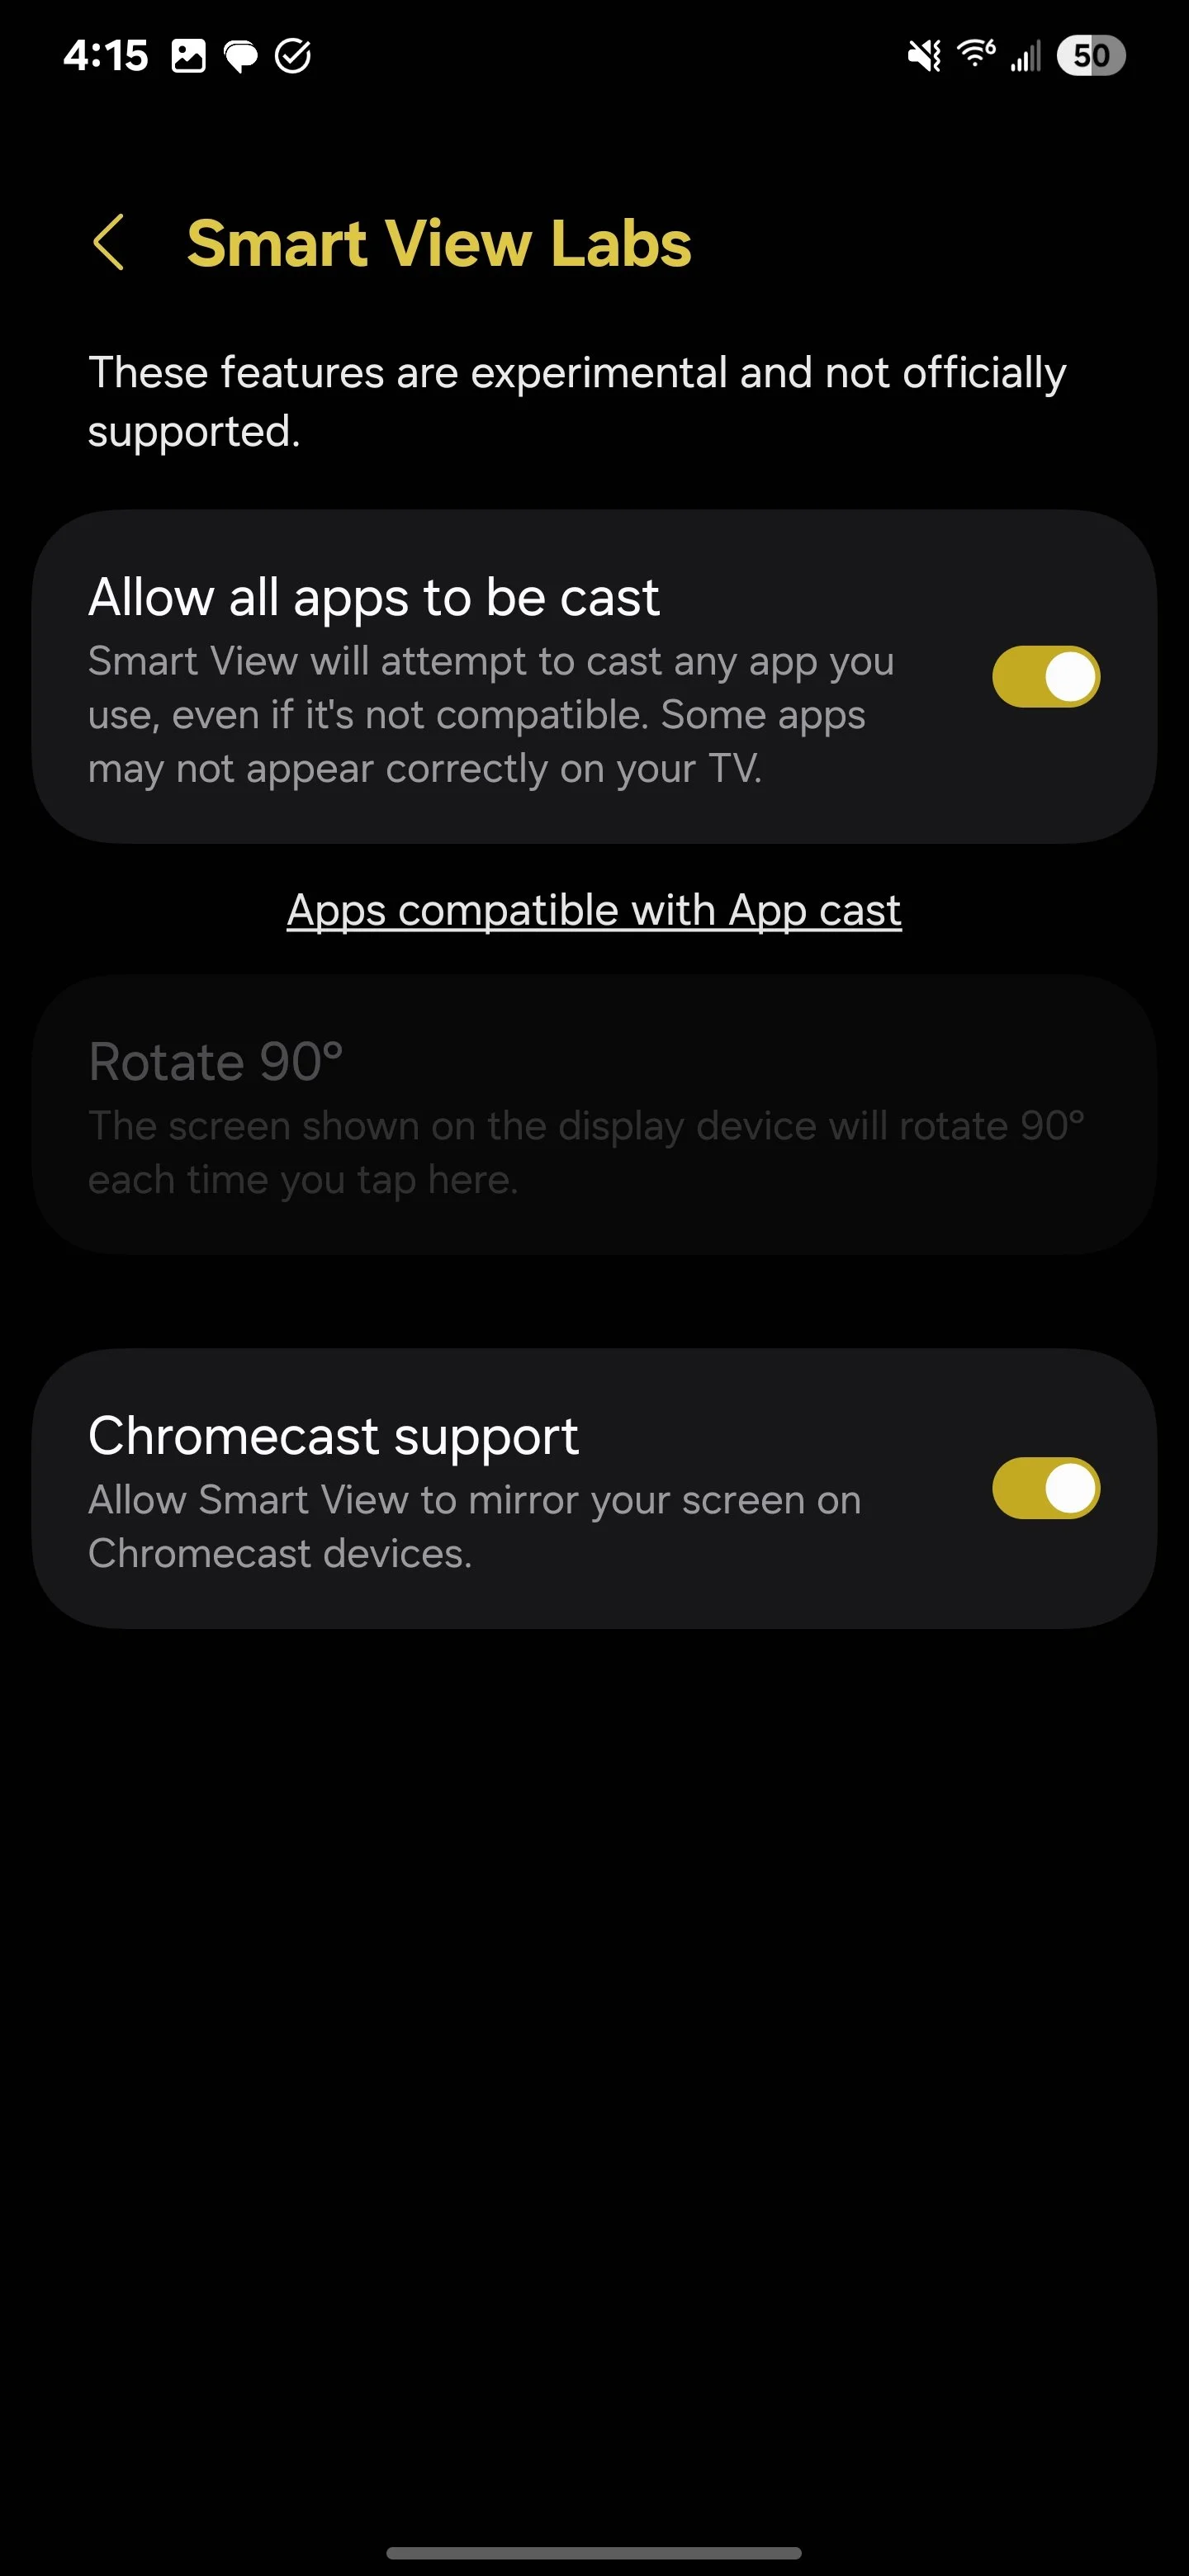
2. Chromecast Support in Quick Settings:
Surprisingly, Chromecast support isn't enabled by default in the Quick Settings' Smart View option. To activate it, once you select Smart View, navigate to Settings > Labs and toggle on "Chromecast support." This allows you to easily cast to your Chromecast devices. Why this isn’t on by default is beyond me.. At least it’s easier to enable than it used to be.
3. Navigating Like a Pro:
Ditch the three-button navigation and embrace the sleekness of gesture navigation. Go to Settings > Display > Navigation Bar and select "Swipe gestures." A swipe up takes you home, swiping in from the sides goes back, and a swipe up and hold shows recent apps.


4. Unleashing the Power of Wallpapers:
Long-press on an empty home screen space and choose "Wallpaper and style." Explore the AI-powered wallpaper options:
Generative: Create unique wallpapers by describing what you want. Imagine a "yellow daffodil" and let the AI bring it to life!
Photo Ambient: Use your own photos, and the AI will add weather effects to match your local conditions.
5. Customizing Your Lock Screen:
In your main settings you’ll see a category called “Lock Screen and AOD.” There you can personalize your lock screen with different clock fonts (download more via the three dots to the far right), widgets, and even a color palette that complements your wallpaper.
In that same section, you can enable "Show lock screen wallpaper" for a visually appealing, albeit slightly more battery-intensive, experience. Your lock screen wallpaper will subtly fade in, creating a unique look.
6. Optimizing Display Settings:
Maximize your visual experience by switching to QHD+ (1440p) resolution in Settings > Display > Screen resolution. This unlocks Pro scaler and the next-gen provisual engine for enhanced image quality.
7. Smooth Scrolling and Battery Life:
Balance smoothness and battery life by adjusting the motion smoothness in Settings > Display. "Adaptive" offers 120Hz for smooth scrolling, while "Standard" (60Hz) conserves battery.
8. Embracing Dark Mode:
Conserve battery and reduce eye strain by enabling dark mode. Swipe down from the top and tap the moon icon you’ll see in Quick Settings. Once you know where it is, it makes sense, but at first this setting might be a bit hard to spot.
9. Circle to Search: Your Visual Assistant:
Long-press the navigation bar (or home button) at the bottom of the screen to activate Circle to Search. Tap text to copy, search, or translate it. Circle an image to perform a Google search for it. This is also incredibly useful for copying text within an image or for searching for a song.
10. Gemini vs. Google Assistant:
By default, long-pressing the power button launches Google Gemini. So long, Bixby! If you prefer the Google Assistant, you can switch back in the Gemini app's settings. For a full breakdown on how useful Gemini is for me, check out this video.


12. Customizing the Side Button:
Remap the side button functionality in Settings > Labs > Side button. Here you can change that Long Press = Gemini function back to Bixby or back to the old power menu. You can also set the double press to a ton of different options besides the default camera app.
13. Mastering the Samsung Keyboard:
Optimize your typing experience by using the AI features in Samsung Keyboard. Enable writing assist and drawing assist through the settings cog on the top right of the keyboard. You can also enable third party options like Gifs in the same settings menu. Looks for “Select Thitd-Party Content to Use.”
14. Writing Assist: Your AI Proofreader:
Use the AI icon on the keyboard to access writing assist features like spelling and grammar correction as well as formatting. As someone who can’t type on a touchscreen to save their life, this is a very useful feature.
15. Edge Panels: Your Productivity Hub:
Swipe in from the edge of the screen to access customizable panels. Explore tools, clipboard, people, tasks, and more. The clipboard panel is especially useful for quickly accessing copied text and images. You’ll also see “AI Select” on the Edge Panel and this allows you to do all sorts of interesting things like trigger Writing Assist and Drawing Assist.
16. Sound and Vibration Tweaks:
Crank up the vibration motor’s strength in Settings > Sounds and vibrations > System vibration.
17. Phone App Power-Ups:
Explore the phone app settings for features like:
Call Assist: Use text call to answer calls silently or let the AI assistant handle initial interactions.
Live Translate: Break down language barriers with real-time call translation.
Record Calls: Automatically transcribe recorded calls for easy review.
Bonus: The S Pen
While the S Pen might not have many new features, it still offers handy tools like screen write and sketch to image. Remember, pulling it out with the screen locked allows for quick note-taking.
Hopefully this guide equips you with the knowledge to truly master your Samsung Galaxy S25 Ultra. Stay tuned for a future post focusing specifically on camera tips and tricks! Don't forget to share your own favorite tips in the comments below!